Introduction
Understanding pallet rack load capacity isn't just about numbers on a chart — it's about knowing how those numbers were calculated and what variables affect them in real-world use.
While most rack beams and frames are sold with load ratings, those ratings assume ideal conditions — evenly distributed loads, correct beam spacing, perfect anchoring, and consistent pallet quality. In an active warehouse, conditions rarely stay ideal for long.
At SJF Material Handling, we help clients design and engineer rack systems that meet both safety standards and operational demands. This guide breaks down how to read pallet rack capacity charts correctly — and what to look for when planning, installing, or inspecting your system.
Understanding How Pallet Rack Capacity Works
Pallet rack capacity is determined by two key components:
- Beam Capacity — how much weight the pair of beams can safely support across a bay.
- Frame (Upright) Capacity — how much vertical load each upright can support, based on total weight, beam levels, and spacing.
Together, these values define the total system capacity. The most common misunderstanding? Assuming that beam and frame capacities can be mixed or applied universally. In reality, capacity depends on configuration — spacing, height, and load distribution all play major roles.
Beam Capacity: Understanding the Key Variables
Pallet rack beam capacity represents the maximum load that a pair of beams can safely support without exceeding allowable deflection or risking structural failure. Actual beam capacity is influenced by several engineering factors, including:
- Beam length
- Beam profile and material thickness
- Connection type
- Deflection limits
Load ratings are typically calculated using uniformly distributed loads, accounting for both the product load and the dead weight of the beam itself.
Beam Length
As beam length increases, deflection under load also increases. Longer spans require heavier profiles or higher-gauge steel to maintain the same capacity and deflection limits.
Beam Profile and Material Thickness
Both the steel gauge and beam face height play critical roles in determining capacity. Thicker steel and taller beam profiles provide greater resistance to bending and deflection, resulting in higher load ratings.
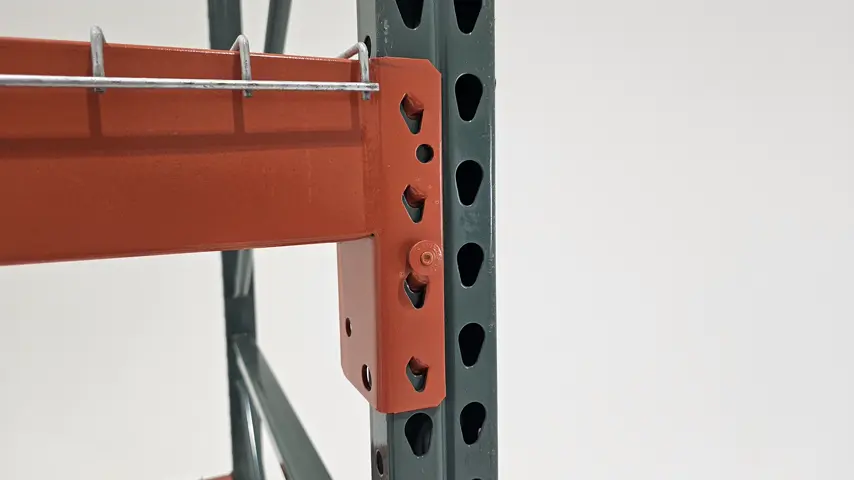
Connection Type
Beams typically connect to upright frames using tabs, pins, bolts, or hook-style connectors. Connection integrity directly affects overall rack performance — a loose or insecure connection can reduce both the beam and overall system capacity. Always ensure connections are properly engaged and locked before loading.
Deflection Limits
According to RMI (Rack Manufacturers Institute) standards, maximum allowable beam deflection is defined as L/180, where L is the beam length in inches. For example, a 96-inch beam has a maximum permissible deflection of approximately 0.53 inches (96 ÷ 180). Deflection exceeding this limit indicates overloading or possible structural compromise and should be corrected immediately.

Frame Capacity: Understanding the Structural Limits
The load capacity of a pallet rack frame is determined by several interrelated factors:
- Upright height
- Beam level spacing
- Bracing configuration
- Column width and profile
- Material gauge
- Rack type (roll-formed vs. structural steel)
Upright Height
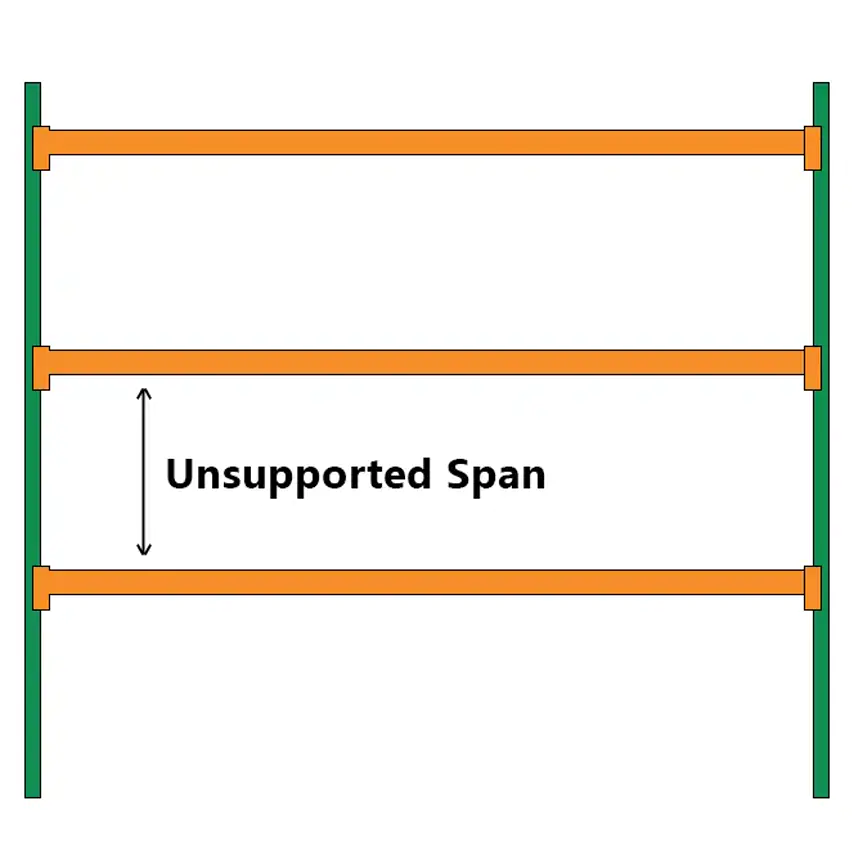
Taller frames experience greater leverage and deflection, lowering the overall rated capacity. One way to improve capacity on taller frames is to decrease the unsupported span by increasing the number of beam levels.
Beam Levels and Spacing
The unsupported span - the vertical distance between two beam levels - plays a major role in frame stiffness. As beam levels are added and spacing between them decreases, the structure becomes more rigid and can support greater loads. Conversely, removing levels or increasing vertical spacing reduces stiffness and overall capacity.
This is why published frame capacity charts typically specify ratings per pair of frames at defined beam spacings (e.g., 48", 60", or 72").
| Height | Frame Capacities (lb) | ||||||
|---|---|---|---|---|---|---|---|
| ≤ 21' | > 21' | ≤ 21' | > 21' | ≤ 21' | > 21' | ||
| 36" | 27,600 | 29,300 | 32,900 | 34,900 | 38,000 | 40,400 | |
| 42" | 26,900 | 27,400 | 30,700 | 32,500 | 35,500 | 37,700 | |
| 48" | 23,900 | 24,500 | 27,000 | 28,700 | 31,000 | 33,100 | |
| 54" | 21,900 | 23,100 | 25,000 | 27,400 | 29,000 | 31,600 | |
| 60" | 19,800 | 20,900 | 23,400 | 24,900 | 27,200 | 28,800 | |
Column Width and Material Gauge
The size of the upright column plays an important role how much total capacity a frame can support. The larger the column the more weight it can handle. This is also true with material thickness. The stronger the steel the higher the capacity.
Rack Type
There are two different types of racks and each have different load capacities. Structural pallet rack is going to be capable of supporting more weight than roll-formed pallet rack.
Real-World Considerations
Frame capacities are generally established under controlled testing conditions, but actual performance can vary once installed. Variables such as floor flatness, anchoring method, and seismic or wind design requirements can significantly impact system capacity and safety. Always verify that your installation conditions match the parameters used in the manufacturer's testing and capacity calculations.
Why Pallet Type and Load Distribution Matter
Not all pallets load the same way. Rack ratings assume evenly distributed loads - but in practice:
- Chep or block pallets spread weight evenly across beams.
- Stringer or broken pallets can cause point loading, drastically reducing beam life.
- Unevenly loaded pallets (like heavy drums on one side) can cause one beam to carry more than its share.
Even if the total weight is within the published capacity, uneven distribution can still lead to beam deflection or failure.
Always inspect pallets for consistency and ensure operators load product evenly between beam connectors.
Reading a Rating Chart: What to Look For
When reviewing a manufacturer's rack capacity chart, pay attention to:
- Beam length and profile (e.g., 3.5" step, 4" face, 14-gauge steel)
- Rated load per pair of beams
- Maximum allowable deflection
- Frame column size and bracing type
- Tested beam spacing
- Notes about anchoring, seismic zones, or special configurations
Each of these values assumes specific installation conditions. If your design differs — different height, extra levels, or mixed beam lengths - you'll need recalculated ratings.
Real-World Factors That Affect Capacity
Even properly rated systems can become unsafe when:
- Beams are reconfigured without recalculating capacities
- Uprights are damaged or not plumb
- Anchors loosen over time
- Pallets extend beyond beam ends (increasing leverage)
Routine inspection and re-rating after layout changes are essential. SJF recommends a periodic engineering review whenever racks are moved, reconfigured, or loaded differently than originally designed.
Conclusion
Understanding pallet rack load capacity is more than checking a chart - it's about interpreting those numbers in the context of your real facility.
A rack system is only as strong as its weakest variable, and ignoring factors like beam spacing, pallet condition, or anchoring can turn a compliant system into a hazard.
With SJF Material Handling's engineering expertise, you get a system rated, designed, and installed for how you actually work - not just what the numbers say.